Monday, December 9, 2024

Visit Me on Pinterest!

As much as I love blogging, I’m realizing with my limited time schedule that I don’t make as many cards as I would like. And mailing out cards has been way at the end of my to-do list. But with Christmas just a few weeks away, I’m aware of just how important it is to actually send some “folded hugs.” Many people are lonely and just knowing that someone is thinking about them needs to be a bigger goal for me as a card maker. Because of this, I feel it’s time to slow down on my blogging and focus on making more cards and sending them out more often.

Snail Mail Studio will still be a place where I have occasional posts, especially for card-making challenges, cross stitching and crochet, but until I have more time, I plan on posting all of my work on Pinterest just because it’s faster and easier. I’d love to have you follow me over there if you'd like. Simply click the banner to the right (for just my cards) or click HERE for all my projects and pins.

I personally want to thank each of you who frequently visit my blog and make such kind comments. May we all keep crafting and be a blessing to others. 

Hugs, Barbara

Friday, December 6, 2024

Cute Snowman "Ornament"

Finding the perfect gift for a neighbor who just had a baby can be challenging. In my past, I've always felt like I overdo things. This time, I wanted just a simple gift that would be easy to make, super cute and commemorate the birth of a first child.

I started by buying a pattern that was just too big for an ornament. Then I stumbled upon THIS SNOWMAN over at Etsy and found him to be perfect. His price can't be beat either. He was on sale for just $1.39 when I purchased him, but even at $1.99 regular price it can't be beat.

I also love buying PDF cross stitch patterns because it's easy to screen shot them and mark the rows off. It's also nice to be able to zoom in on both my iPad and my phone.

The only thing lacking in this pattern was the wording. For that I went over to STITCHPOINT and wrote out Asher's name and date of birth. I sketched that in to the left of the snowman pattern and it worked great. The only problem was that it made the design a bit larger than I wanted, but still within the acceptable size for an ornament. It ended up fitting in a 5" circle hoop. I finished it off with a bow, a bit of stuffing in the back and felt behind that.

His mom really liked it, and that's what it's all about!

Monday, December 2, 2024

Santa & Fido

Here's a fun freebie that's perfect for any dog-lover on your Christmas Card list. It shows a dog, which I believe to be a greyhound variety, looking up the chimney as Santa is falling down it. I know my dog Bella would be going crazy!

Here's the free digi. As always:

  1. Snag it to your desktop or photos.
  2. Put it in a Word or Page Document.
  3. Resize it to the size card you want to make.
  4. Print it out, either at home or at a copy center. 
I hope you enjoy the freebie! Thanks for stopping by my blog today and have a wonderful day!


Sunday, December 1, 2024

In The Meadow...

Here we are in December already! Time goes way too quickly these days. I had hoped to make more Christmas cards by now, but I still have a few weeks so that's good.

The first card of this month is called "In The Meadow...." with thoughts of the timeless song that continues "we can build a snowman..."

I really do love snow even though I'm here in Florida. I have many fond memories of playing as a child, then playing with my own children, in the snow. There's really nothing that says "Christmas" quite like snow, although my mom reminds me that Jesus was born in Jerusalem and that it doesn't really snow there are that it really has nothing to do with Christmas.

Bah humbug!

This card will be entered into two challenges: 1) NBUS Challenge #69 because I bought this set last year from Mark of the Angel Card Project and haven't used it until this card and 2) WORD ART WEDNESDAY"S Challenge 675 & 676 because they have great challenges that are always "anything goes."

Here's my complete supply list:

  • Lawn Fawn's Making Frosty Friends
  • Lawn Fawn's Merry Messages
  • Patterned Paper (gifted from a friend)
  • Stampin' Up! Mossy Meadow Card Stock
  • SU! Pear Pizzazz Card Stock
  • Memento Black Ink
  • Stickles Star Dust Glitter
  • Copic Markers
Thanks so much to everyone who makes these challenges
possible time after time. I really appreciate the inspiration and the ability to share!

This card is a little bigger than even a regular slimline so I think it's going to take a bit more postage to send it to someone. Hopefully they will like and appreciate snow!

Thursday, November 28, 2024

Blueberry Sweetie Pie

Well it's Thanksgiving Day here in the United States and of course there's so much to cook, but while it's still early (and not wanting to make a lot of noise in the kitchen and wake everyone up) I snuck in one last Thanksgiving card. 

This one was made because my last card turned out to be much bigger than anticipated, and I had already made the envelope for this. Not wanting to waste a perfectly good envelope, I made a card to go with it.

Here's my complete supply list:

  • Pink & Main's Sweetie Pie Stamp Set
  • True White Card Stock
  • Copics E34, E35, B24
  • Core-dinations Patterned Paper
  • Stampin' Up! Cinnamon Cide Card Stock
  • SU! Self Adhesive Small Brads

Since this is a blueberry pie, I guess it's a good one to send all year long, but there's just something about pie that screams Thanksgiving.

If you're reading this in the U.S. on November 28, a very Happy Thanksgiving to you. And as always, thanks so everyone who stops by my little blog. Now it's time for me to do some real baking!

Wednesday, November 20, 2024

Retro Rubber Sketch Challenge #244

Wow, I really needed this challenge today. It's just one week until Thanksgiving, and I've sent out a few cards, but needed one for my sister-in-law in Maine. If it doesn't go out tomorrow, it may not make it in time, so this was the perfect nudge I needed to get a card off to her.

My design started over at Retro Rubber's Challenge #244. It's a fun sketch this time that really challenged me to get the design just right. I followed the design quite closely, just changing the placement of the brads and having a straight sentiment rather than a curvy one.

When I first saw the arch in this sketch, I immediately thought of a pie stamp that I bought last year and hadn't ever used. The rounded top of the pie fit nicely into the arch.

Here's my complete supply list:

  • Pink & Main Sweetie Pie Stamp Set (2022)
  • Pink & Main Happy Harvest (sentiment)
  • Stampin' Up! Very Vanilla Card Stock
  • Copics E35, E34, R14, R35, B24
  • Home Sweet Home Patterned Paper by Carta Bella
  • SU! Brown Sugar Ink & Card Stock
  • SU! Small Brads

I had to make this card a bit bigger than usual to capture the little canisters of baking supplies on the patterned paper. It measures 5.5 x 7.5. Luckily I have an envelope board and was able to make a cute envelope to fit it.

Thanks so everyone over at Retro Rubber for another fun challenge!

Cardz 4 Guys Challenge #360

What a perfect challenge this is for me over at Cardz 4 Guys! All they are asking this time around is to use your favorite color(s) and of course, make a card that a guy would like. Easy peasy, since my favorite colors are browns and off whites. 

I played around a lot with different colors of ink, mostly from Stampin' Up! Here's a pretty good idea of my complete supply list:

  • Stampin' Up! Wonderfall Stamp Set
  • SU! Beautiful Autumn Stamp set
  • SU! Brad Dots
  • SU! Brown Inks
  • Copic Marker C00
  • Craft Card Stock & Envelope
  • SU! Early Espresso Card Stock
  • SU! Sahara Sand Card Stock
  • Penny Black Sentiment


Fun note about the brads-I added them because the ink smudged on the large leaf. It's always fun to see how things come together even when mistakes are made!

Hop over to Cardz 4 Guys anytime and join in the fun. Guys need paper hugs too! 

Thursday, November 14, 2024

Floral Frames Card for 2 Challenges

This morning I made a quick card using an older Stampin' Up! set called Floral Frames. I've never used this set before. It's one that I picked up at a yard sale. Sometimes I scoop up on good deals without thinking too much about whether or not I like the set, and I wasn't sure that I liked this one once I got it home. Rather than just donate the set to the Salvation Army, I thought I'd give it a try.

Turns out, I really like the card that it made. One thing I really do like about the set are the sentiments. Of course there's this one that says "Wishing You The Best." That's always a good card to have around because it has many uses. But there's also "Hello" and my personal favorite "Sending Love."

Here's my complete supply list:

  • Stampin' Up! Floral Frames Stamp Set
  • Memento Northern Pine Ink
  • Memento Pistachio Ink
  • Copics in Y02, YG61, G61
  • SU! Patterned Paper
  • SU! Lemon Lolly Card Stock
  • SU! Always Artichoke Card Stock

Since this is a new-to-me stamp set, I'm linking it up over at NBUS Challenge Blog and at Word Art Wednesday Weeks 673 & 674 because they always have an "Anything Goes" theme.

Thanks so much for stopping by and I hope you have a wonderful day!

Saturday, November 9, 2024

Keurig(ing) on the Cheap for the Holidays

Usually I’m an early adopter, but it took years for me to succumb to the Keurig machine. I don’t use it every day, but I’m glad I finally added this small appliance to my kitchen lineup, especially now that it’s more affordable than ever. 

This past summer, I started feeling like a cup of coffee in the afternoon. Rather than make a whole other pot, I thought it was time to finally buy a Keurig.

I also had hoped to duplicate the taste of those expensive coffee shop coffees at a fraction of the price. (More about actual taste later.)

Knowing nothing about these machines, I found this one at Walmart* that was only $50.00 and thought for the money it was worth a try. I'm so pleased with model. First of all, the price was just what I wanted to spend. Second, it has a reservoir that only needs to be filled every three to four cups. Second, it has three cup sizes, 6, 8 and 10 ounce. (The size coffee pod is the same for each, so the 6 ounce just comes out stronger than the 10 ounce.) And lastly, I didn't know this until I bought it, but it brews a cup of coffee in less than one minute-perfect for those days when I'm in a hurry and forgot to push the "brew now" button on the big coffee maker.

Also, as of the writing of this post, they come in really cool colors. I'm kind of boring, so I like all my appliances to be black, but the color choices are a lot of fun too!

ON THE CHEAP

When the holidays are over, I'm sure they'll have
another great variety pack too!
One reason I waited so long to purchase the Keurig was that the cost really came down. New they are $49.00, but I find many on Facebook Marketplace that look like they're in really good shape for as little as $25.00. So if you're buying for yourself, that may be a really good option too.

The bigger problem when they first came out was the price of the coffee pods. They were running about $1.00 each and drinking three cups of coffee every day could really add up quickly. Today I picked up this variety a box of 60 pods at Sam's Club for just $15.00. So at .25 cents a cup, I'm ready for a lot of guests! They also go on sale frequently at the grocery stores too, so no worries if you aren't a Sam's Club member.

Lastly, getting a display for your coffee pods is really easy at yard sales and thrift stores. I used to keep all my pods in a box in a cabinet, but after getting this spinner caddy at a yard sale for $3.00 I keep it on the counter. It will be perfect for guests coming over at Thanksgiving and Christmas.

TASTE

As for the taste, they're good, but it's not a replacement for Starbucks. It's just not. It's nice to sit down on a fall afternoon with a Butter Toffee Coffee, but there's just nothing like the creamy, bold taste of a Starbucks drink. But considering the cost, it's a pretty good second.

Flavored creamers can add a lot of variety too. Mix and match for a lot of unique flavors!

Mostly I love the fact that I can easily grab a cup of coffee super-fast. And soon that guests can enjoy a cup of decaf, regular, cocoa or even tea without a lot of fuss.

If you like coffee and haven't tried this yet, or if you're having a big gathering this holiday season, this may be the perfect time to give the Keurig a try!

*Note: I received no compensation from any company to write this review. ALSO, this link leads to a Black Friday sale, but mine was still $49.00 in the summer. I bought one here in Florida for that price and then brought my daughter one in Wisconsin. They were $49.00 both places.

Friday, November 1, 2024

Christmas (or Not) BINGO Challenges


Well here we are at the last challenge of the year for Christmas (or Not) BINGO Challenges. For this one I chose to go  Column "N" and the elements I chose were PINK, BUTTONS and RIBBON. I chose this column because I had all the materials on hand to make this mini tabletop quilt project. A while back I bought a 5-pack of fat quarters from Joann's. I love their pre-packaged fat quarters because it's an easy way to get a cute combination of coordinating fabrics for not too much money. 

In addition to having the fabric on hand, I have a jar of vintage buttons that I used. I thought that using assorted buttons would go well with the shabby chic look of the quilt. Lastly, my ribbon, which is used to divide the patchwork from the edges is an old Stampin' Up! Ribbon that I had in my stash.

I used an old pillow case for the backing and I even had pink thread on hand, so this project cost me nothing out of pocket today!

Quilting is not something that I usually do, but I've been intrigued with it, and this little project was a perfect way to start experimenting with the craft. I have to say, that I'm not that good at it. It's a lot harder than it looks to get all those little squares lined up perfectly, but thankfully with the busy prints it's not too noticeable.

In the photo above on the left you can see how I simply designed the small quilt. And on the right, I laid out the pieces before sewing them together. It's amazing how much the pieces "shrink" when sewn! 

I think this finished piece will be great for Valentine's Day, Easter, or any spring tabletop display. 

If you'd like to join us, either with a handmade card, or any other craft, we would love to have you play along. Check out the BINGO Card, choose any column (up and down only) and show us your projects!

Wednesday, September 25, 2024

Word Art Wednesday Guest Designing, Again!

Well it's the second time in the month of September that Word Art Wednesday has a new challenge, and once again, I'm guest designing for them. 

Today's card is made using the featured scripture from 2 Chronicles 15:7 that says, "Be ye strong therefore and let not your hand be weak; for your work shall be rewarded." I just love that! What an encouraging verse, especially for someone in ministry.

I took that scripture and printed it out. Because it looks more gray than dark black, I stamped a vintage pot of flowers from The Stamp Pad Company in Big Lake, Minnestoa using Stampin' Up!'s Basic Gray Ink. I really like how it turned out because it's more subdued and that allows the colors of the markers to stand out more.

I mounted it on purple card stock from Michaels and then used some patterned paper to give it a little texture in the background. It's all mounted on the coordinating Gray card stock from Stampin' Up. 

My Copic colors are: Y35, YR02, YR18, G82, YG63, V04 and RV55.

It's a simple card, but I really love the message and I feel that stands out more because of that.

It's always so much fun to play along over at Word Art Wednesday. You can use the scripture that they provide, but you don't have to. All of their challenges are "anything goes" and it would be great if you could join us! Plus, they're giving away a $25.00 gift certificate to Gina K stamps, who is the sponsor this round.

Thanks so much for stopping by my blog today, and a very big thank you to Karen and everyone over at Word Art Wednesday not only for having me as a guest designer, but for all the great challenges you put on each month!

Saturday, September 21, 2024

3 Halloween Cross Stitch Freebies

Hello crafty friends! Today I completed three adorable, and not too scary, cross stitch pieces that I wanted to share with you.

The first two are the smaller cats on the right. The patterns are from Pinker & Punkin. Her designs are so adorable, and what I really like about these two is that they fit perfectly in a 3" x 3" frame. I picked mine up from Michaels for 2.99 each.

The link to the top cat is HERE.

The second cat, also a freebie from Melisa at Pinker & Punkin is available HERE. This cat had the border around the edges, and I just copied it onto the above cat, which didn't have a border.

On all three of these designs I used DMC floss that was a little different than the colors they suggested. I did this because I wanted to match another piece I was working on.

The third piece, the jack-o-lantern in a coffee mug is from an Italian designer who also has so many cute free patterns on her blog. The link to this particular pattern is HERE

A note about the larger image: I put it in a 5" x 7" frame that I found at Ross. I wasn't looking for a frame, but I passed them by and this one really jumped out at me. I thought it was perfect for Halloween and to my delight it was on clearance for less than $5.00. I like how different it looks. To make the image fit, I went through my vintage button jar and pulled out several black buttons and arranged them around the image. I like the look because I have a little "Happy Halloween" saying that is about 2" tall and I can put it in front of this without blocking the view of the stitched image.

I hope you enjoyed seeing these freebies and that you'll like stitching them as well. Thanks so much for stopping by today!

Tuesday, September 17, 2024

Feeling Fallish at Retro Rubber


As my 25-year-old daughter frequently says, 'I'm gonna be real.' This card was a bear to make! No fault to Retro Rubber though. I just had to try out a new technique, and it didn't go quite as I had planned. I guess after stamping for so many years, I'm not used to things being difficult. But here's what happened with this card.

I loved the colors over at Retro Rubber Challenge #239 (#rrcb239). The theme is Feeling Fallish, and even though it's still in the low 90's here in Florida, I am feeling fallish for sure. I'm crafting fall things and drinking pumpkin coffee and planning what I'm going to wear to Wisconsin next month. I will be so excited to drink a pumpkin coffee in a sweater while looking at autumn leaves. 

Here's my lineup of ink colors to match the Retro Rubber ones:

I recently saw a technique on Pinterest that I thought would be perfect for this theme and set. You tape off certain areas of card stock and brush them with ink. The card on the left below is my first attempt. I didn't like it because the lines between the inking were crooked. I abandoned that then stamped my image with Versa Mark and used clear embossing powder, then brushed over the images (on the right). It was almost perfect, but I threw in some Rich Razzleberry Ink and it was too dark. But the third time is a charm!

FAIL!

Since I have the dies to this set, I'll cut these out and use them on other cards. And finally, my complete supply list is:

  • Stampin' Up! Lighthearted Leaves (2015)
  • SU! Very Vanilla Card Stock
  • SU! Inks (pictured above)
  • Simon Says Stamp Cream Embossing Powder
  • Versa Mark Ink
  • Michaels Card Stock in Purple and Orange
  • Sizzix Border Dies (559200)

Many thanks to everyone over at Retro Rubber for another fun challenge. I really feel like I've been stretched and have learned a lot with this one. I already know whom I'll be sending this card to on Thanksgiving, and I'm looking forward to making two other similar cards with the "mistakes."

Thanks so much for stopping by and have a crafty day! 

Sunday, September 15, 2024

Gorgeous Autumn Posies

Here's a card that I made using one of my most favorite stamp sets. It's called Gorgeous Posies from Stampin' Up! I love this set because it uses the two-step stamping technique. The two-step goes way back a long time but it's still a really fun way to easily get a great look. I also love how muted this stamp is. I think it's called Distinktive by Stampin' Up!

What inspired this whole card is the patterned paper. It's quite old. It came from a partial scrapbook pad that someone gave me years ago, and it was old then! If I had to guess I think it dates back to the 1990's. But I still love the autumn colors. The paper is also thin (think cheap) but that makes for really nice envelopes, which is what I included with this card.

Here's my complete supply list:

  • SU! Gorgeous Posies Stamp Set
  • Misc. Vintage Patterned Paper
  • SU! Scalloped Edge Die
  • SU! Wild Wheat Card Stock & Ink
  • Memento Rhubarb Stalk Ink
  • Memento Pistachio Ink
  • Memento Olive Grove Ink
  • SU! Early Espresso Ink
  • Speckletone True White Card Stock

And that's it for this one. I really like it's soft, late summer colors. And it seems appropriate for the sympathy sentiment that's included in the set.

Thanks so much for stopping by, and have a wonderful late summer day!

Wednesday, September 11, 2024

Word Art Wednesday Guest Designing!

I'm so excited to once again be a guest designer over at Word Art Wednesday for the month of September! This first week has a beautiful scripture from 1 Samuel 12:24. It's a great reminder that we need to remember all the wonderful things God has done for us. Sometimes it's so easy for me to just dwell on the things that I'm still struggling with and to forget the things that He has brought me through.

If you want to get this scripture to use in a design, it's available over at Word Art Wednesday, so feel free to go over there and download it. There are so many fun things to do with these digital verses. The background has already been removed, so it looks great over a photo that you've taken, incorporated into a digital design like I've done here, or just print it out and use it on a card!

My design, which was created to mimic stained glass in the background, is also available for free for your personal use if you like. All you have to do is grab it from the page here, size it accordingly (mine is a 5 x 7 greeting card) and print it out.

I like to use Fed Ex for my printing. For less than $1.00 they print an 8.5 x 11 sheet of paper and you can get two of these printed on that size. But printing from home works too if your printer is up for it. Mine always seems to be out of ink! 

After printing out my image, I trimmed it and mounted it on black card stock. The only extra embellishments I used were three turquoise rhinestones to give it a bit of bling.

Word Art Wednesday would love to have you participate with them on their challenges. You don't have to use the scripture, the participation is always "anything goes!" And there are always wonderful prizes too! The sponsor for this challenge is Lawn Fawn. Every entry gets an equal chance to win a $25.00 gift certificate!

Thanks so much for visiting my page here, and I hope to see your entry over at Word Art Wednesday!

Thursday, September 5, 2024

Masculine Card for 2 Challenges

One thing I'm not too good at is creating cards for more than one challenge. I've done it a few times, but I'm what perhaps one could call a "monogamous card maker." However, today I'm pushing myself a little and after looking at all the new challenges out there, decided I would enter this card in two challenges. 

First, Word Power Challenge is such a fun one because we all have so many large sentiments that fit this category. I have to say thought, that both Darlene and Diane have created cards with drinks on them. At first I thought that that may be the theme, but I didn't see any evidence of that, so maybe it's just a coincidence. But still, I may try to go back and follow that theme later this month. 

The second challenge I went with is from
Freshly Made Sketches. I followed the design, however I did offset a few things to make it look more balanced for my card.

Here's my supply list:

  • Speckletone True White Card Stock & Envelope
  • Stampin' Up! Rooted in Nature Stamp Set
  • SU! Soft Suede Ink
  • SU! Old Olive Ink & Card Stock
  • SU! Blueberry Bushel Ink
  • SU! Night of Navy Card Stock
  • Carta Bella Pattern Paper
  • Memento Bamboo Leaves Ink

I did learn two fun things while making this card. First, I discovered that some of the dies that go with the Rooted in Nature set are embossing dies, so that's kind of fun. I planned on cutting out an outline die and found that it embossed. I'll have to play around with those a bit more. Sometimes I feel like I have too many stamps and supplies (is that possible!) but I'm not as familiar with them as I could be.

Second, I always lay out my design then try to stamp the background images on after I've moved all the front stuff out of the way. This time I lightly traced around the front images so my trees were stamped more precisely. After stamping I erased the pencil lines. I've never taken the time to do that and I think it really helped with this card.

Many thanks to everyone over at both Freshly Made Sketches and Word Power Challenge Blog for helping me make another fun card! 

Wednesday, September 4, 2024

Happy Autumn Banner


When I read that someone in The Angel Card Project loved to decorate for fall, I had the idea to make a banner for her instead of just a card.

I've made banners like this before, and while I like it, looking at it in the pictures and after it was finished, I wished I had made the stamped letters in a little darker color. I still think it looks pretty good and I'm pretty sure the recipient will like it. Often I'm too hard on myself, but it's also good to think about how I can make things better in the future too. :)

The supplies are simple. I used Stampin' Up!'s Large Letters Stamps and Dies in traditional SU! fall colors. Most are still in the lineup, but one that I used that isn't is called Delightful Dijon. It's the perfect fall ink color in my opinion.

The leaves are also from Stampin' Up! The set is called Vintage Leaves and it too is one of my all-time favorite sets. The wood grain paper came from an old Christmas Paper Pack Set. The banner is strung together with brown twine from Michaels and finished off with some raffia that I tied into bows.

Wishing you a very Happy Autumn too, and thank you so much for stopping by my blog today!

A little bit of a closer look. I think it looks a bit better here! 

Monday, September 2, 2024

Ribbon Tied Keepsake Cards


Last week was my 62nd birthday and I got a fair amount of cards. Saving cards from birthdays is something I've always done. I have a decorative box and for years I've just piled them in there. This year, I tried something different. 

I sorted the cards and threw most of the envelopes away, but I did save a few. The pretty ones made it, and this one on the right, which has my birthday and city and state on it makes a nice memento. Then I chose one for the front of the stack and chose a matching bow. Before tying it, I used a small die to cut out a scalloped tag. I used some small stamps to stamp the year, but you can certainly hand-write that in as well. I used some thin gold thread to make a tie, then tied it all together.

Components of the date tag. 

The last picture below shows the pile of cards. Nice enough, but grouping them together really does make them more special.

As I get older, I realize that some of the cards that I receive may be one of the last ones from some people. I've already experienced that with my step-father who passed away five years ago. He was like a real father to me, and each of the times that he signed a card is twice as precious now. So I'm starting to take treasuring these cards more seriously now. And I think this is a little extra special way to do that!


Sunday, September 1, 2024

Christmas (or Not) BINGO Challenge #9


Here we are just 115 days away from Christmas! This year has flown by, and I'm glad to have made another creation to help celebrate when the 25th of December does arrive.

This piece was created especially for the September/October Christmas BINGO Challenge. I used the column "N" and the elements I used were "No Stamping," "Red" and "Layering."

I started out with the idea that I would use "Gemstones" as my third element, and even bought some gem-like red beads to go around the edges of this piece. I bought some special beading needles too. They're super-skinny needles that a tiny bead can pass through. The funny thing is, the eye of the needle is so small that I couldn't thread it! I'm going to have to talk to them at the cross stitch store about which thread to use for that. So I switched it up a bow for a layered look.

It worked out well though because when I went to my ribbon box I found the perfect wired pom-pom ribbon to go with it. Like the thread, which is Turkish Red by Weeks Dye Works, it to is variegated with bright red and darker red. A perfect match!

You can see the floss variegation a bit better in this close-up picture on the left. It's especially evident on the right hand side of the M and on the top of the S. This was my first time using Weeks Dye Works floss, and while I enjoy the mottled look, I had to run to two different faraway stores to finish the piece. Using DMC would have been much easier and in my opinion, it would have looked just as good.

My pattern was a freebie that I found at a lovely site called Kincavel Krosses. The post is from 2011, but I really think this piece is so timeless. I did, however, find a couple of very minor errors in it. I've included my humble changes in a photo below. I didn't catch the G until afterwards. Ironically, the G was the first letter I stitched, but after looking back I would have made an extra row so that there would only be one space on the top of it.

Other than that, it's a great pattern that can be stitched in any color. I chose red not only because of this challenge, but because I can use it for both Christmas displaying and Valentine's Day as well.

Framing the piece was also something that was a newbie for me. I ordered a custom size frame from a place called Art To Frames. It was my first time ordering there and I was super happy with the selection, ease of ordering and how quickly it was shipped. (And they didn't compensate me in any was for this endorsement! ) By not including glass, the price was what I felt was very inexpensive. Here's what I ordered and my price:

We would love to have you join us over at Christmas (or Not) BINGO Challenges this time! We are an all-crafts challenge and you can create something simple or something more complex. As long as you choose one column (up and down only) and use at least two of the elements (the third one can be a free space) you can participate. It's so much fun doing these challenges, and if you're like me, you'll never know what you'll wind up with!

Lastly, as promised, here are the two changes that I would make if I were to do this pattern again. One I caught, the other I didn't. Even without making these changes, this is a great piece that will look great for decades to come!

Thanks so much for stopping by today, and I hope to see you over at Christmas (or Not) BINGO Challenges!

Wednesday, August 28, 2024

Retro Rubber 238 - The Great Outdoors

Today's card was made especially for Retro Rubber's Challenge #238. (#rrcb238) The theme is The Great Outdoors. And keeping in mind that you have to use a stamp that's older than one year, I started off with a favorite from Stampin' Up! called Always An Adventure. This one dates all the way back to 2016, but it's a great go-to, especially for those difficult guy cards.

Here's my complete supply list:

  • SU! Always an Adventure Stamp Set (2016)
  • SU! Cajun Craze Ink
  • SU! Pear Pizzazz Ink
  • Memento Old Olive Ink
  • Memento Bamboo Leaves Ink
  • Memento Ladybug Ink
  • Memento Rhubarb Stalk Ink
  • Memento Rich Cocoa Ink
  • Memento Summer Sky Ink
  • Versa Mark Ink
  • Clear Embossing Powder
  • Papertrey Blueberry Bushel Card Stock
  • Stampendous Sentiment
  • Copics Y15 & Y26 


I made the stars by stamping them with Versa Mark Ink then heat embossing with clear powder. That made them stay white, like the paper they were stamped on. Then I brushed the blue ink over top of that. I really like the look.

The sentiment was a last minute decision. I thought it looked a little bare but there wasn't a lot of room to stamp too much. I went looking for a small sentiment and thought the words "Keep Looking Up" was perfect for a starry sky. 

It's always a lot of fun playing along over at Retro Rubber. They would love to have you join in!

Saturday, August 24, 2024

Stamped Pie Gift Box

I just found out that you can buy individual cardboard pie boxes from Walmart for about $2.00. They're a perfect way for stampers to decorate a box in a personal way that looks so very cute!

Yesterday it was the birthday of my mom's good friend. He just turned 82 and like most men, he's hard to buy for. Since he likes sweet potato pie, and they're hard to find, I thought I would make him one. Wanting to make it special, I decorated the box in a fun way too.

After buying the box, I stamped some background images directly on the box, then used Stampin' Up!'s Vintage Leaves Stamp Set and Dies to cut out the leaves.

For the wording, I used Stampin' Up!'s Layered Letters. The word "homemade" came from an old Michaels set.

But you can really do anything with a pie box. I think stars or birthday designs would be really cute too. And if you don't have stamps, pre-printed ephemera or even images that you grab from online would be really cute too.

Here's the birthday boy with his pie!
I also noticed that if you want bulk pie boxes, there are a lot of really cute styles available too.

I'm looking forward to using this idea for Christmas and other holidays too, and not just for pies. I think cookies would be perfect in these too!

Here is the link to the recipe that I used and that my mom said was the best ever: 

https://www.allrecipes.com/recipe/12142/sweet-potato-pie-i/

NOTE: I did line the bottom of the pie box with waxed paper, so if there was any grease residue from the pie it wouldn't leak through. This would be really important with cookies too especially if you're going to give them to someone later on.

Thanks so stopping by today, and happy crafting!

Saturday, August 17, 2024

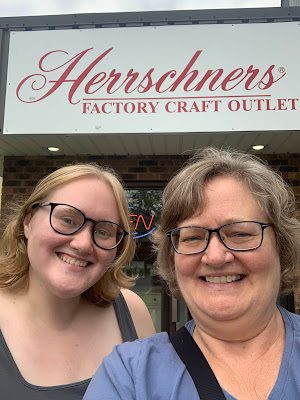
A Visit To Herrschner's Retail Store!


My daughter just moved to Steven's Point, Wisconsin for her first "big girl job." I was delighted with her choice for three reasons. First, she loves the snow and so do I. Now I get to leave Florida several times a year and get to experience a taste of seasonal weather. Second, flights are easy from my hometown to Appleton, just about an hour away. And third, it's the home of Herrschners!

If you're not familiar with them, you can check out their wonderful website at herrschners.com.  I knew it was a wonderful place to buy yarn and I really wanted to see some of their own yarns in person. But I was so blown away by how much this amazing place holds!

The first thing I noticed was the huge selection of cotton quilting fabric. I didn't even know that they sold that, and the selection was amazing! The photo above shows just part of the selections!

On thing that they have throughout the store are samples of crafts. Quilts, afghans and gorgeous sweaters and ponchos were everywhere, providing so much inspiration! The photos on the left and below are just a few of the great projects that they have made up. And many of their items are available in kit forms too.

Their staff is also well-equipped to help you get started on any of these projects as well. Seeing all these wonderful things makes me really want to break away from just making shawls and create something really different.

I love the way all the colors go together too. It was almost autumn when I visited and they did a great job making me feel inspired to start a new fall project!

I hear that Wisconsin winters are brutal, and I so there's so many other things to keep crafty people busy rather than just sewing or crochet. The selection of jigsaw puzzles is the biggest I've ever seen anywhere! I loved the ones in the donut tins, but there are literally hundreds of others to choose from too! Again, the picture below shows just part of their selection.


They also have macrame supplies, cross stitching, plastic canvas necessities and painting supplies too. But I think one of their biggest draws in their back warehouse room that's open to the public. It's filled with discounted items for everyone looking for a great deal on yarn and other supplies!


What I love best about visiting Herrschner's is being able to feel and see the yarns that you're buying. It's also nice to be able to take everything home right then and there. My daughter, on the left, was so sweet to take me there several times and was willing to drive me there as much as I needed. I really appreciate her understanding my craft addictions! I know it's not convenient to most of the country, but if you do happen to be in the central Wisconsin area, be sure to stop by. It's a wonderful place and you'll be so glad you did!