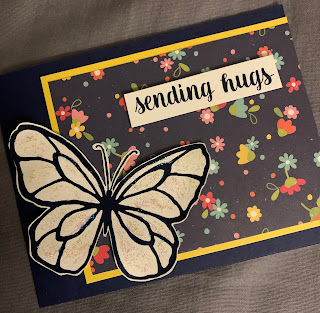
For months I've been thinking about getting some type of foiling machine. Truthfully, I've been really intimidated by not only the process, but the expense, and the extra space it would take up. Then this weekend I watched
a video on Pink & Main's Minc Mini and I went over there and picked one up right away. Yes, I'm blessed to live just a 35 minute drive to their store in Palmetto, Florida. It's such and amazing place and I could literally spend thousands of dollars in there. The Minc Mini was in stock, and I got that and several other supplies that go along with it.
Today's card is my first Minc Mini that I ever made, and I'm entering it into the NBUS Challenge #50. I think I entered there once this month, but I'm so excited to have this new machine I just had to show off my results.
If you're not familiar with the Minc Machine, it's basically a laminator that foils over anything that's toner based. There are some really great YouTube videos out there, but basically it's different than the hot plate varieties that you need special metal plates for.
What I love about this is:
 |
The Minc fits perfectly under this riser and is easy to pull out
when I need it. I keep it plugged in because it has an easy
on/off switch. |
It's small and stores easily under the riser that I put on my desk. - You use one-time papers with it so there's not a big expense buying foiling dies.
- The heat is inside so there's no danger in burning yourself, children or pets.
- The foils are fairly inexpensive. ($14.99 a roll, but it's huge.)
- The foil is reusable as a reverse of the image if you have toner paper to apply it to. (See picture below.)
This card was made using a one-time use, pre-printed piece of white card stock with the flower printed using black toner. I could have chosen any color for the outline of the flower, but I used the silver foil.
In the image on the left, the left card front is the foilable front from Pink and Main. The card front on the right is pink toner paper from Pink and Main using the leftover (reverse) of card front #1.
I noticed that in the card base on the right, the foil is a little spotted and not as clean looking. I think that's from being run through the machine twice. Still, it's salvageable as a card.
Next I used Copic Markers to color it in. The biggest difference between regular white card stock and the toner card stock is that it's a lot like using glossy paper. I thought that was really good for blending the Copics, because they stayed wet longer. I did notice that you can see the streaks of the markers on the surface, but I like that look.
 |
You can see in here that the Copic
Markers blend a little differently
than on regular card stock. |
Also, the markers did color over the foil a bit, but it's not real noticeable on this project. I think if the
markers were dark blue for example it would have showed more.
Then I just mounted it to a piece of card stock made from a Michaels paper pack. To finish it off, I cut the word HELLO out of silver card stock.
And, the HELLO die is also a NBUS product that I've had in my stash for probably a couple of years.
My complete supply list is:
- Michaels Orangeish Card Stock
- Pink and Main Foilable Card Front
- Copics R43, RV14, YR07, Y38, YG13
- Pink & Main Silver Cheer Foil
- Silver Card Stock from Michaels
- HELLO Die from My Favorite Things
 |
| The supplies that I bought to go with the machine. |
I'm excited to see all the other things that I can do with this machine, and to pick up some foilable sentiments and flowers from Simon Says Stamp. It's really great to get something so new and different to bring some interest to my stamping. I may end up getting the other type of hot plate foil machine in the future, but for now, I think this is a great way to start!
But thanks to Darnell and everyone over at
NBUS for helping me get starting using this machine and get an entry in this month's NBUS Challenge!


